

Problem in MAYA rendering
Posted: July 15, 2009
Post subject: Problem in MAYA rendering
Post subject: Problem in MAYA rendering
Hi guys,
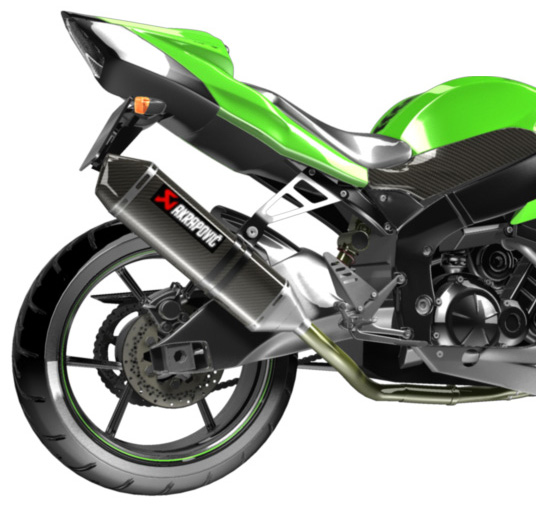
My problem is using rendering in MAYA. I render a Kawasaki but the result is bad. I want the best result like the pic. Please help URGENT!!!!!!!!
Quang
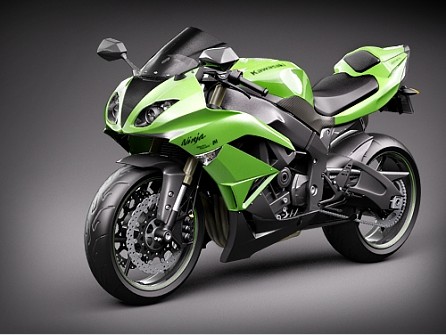
My problem is using rendering in MAYA. I render a Kawasaki but the result is bad. I want the best result like the pic. Please help URGENT!!!!!!!!
Quang
Posted: July 17, 2009
Post subject:
Post subject:

Posted: July 17, 2009
Post subject:
Post subject:
Hi Andyba
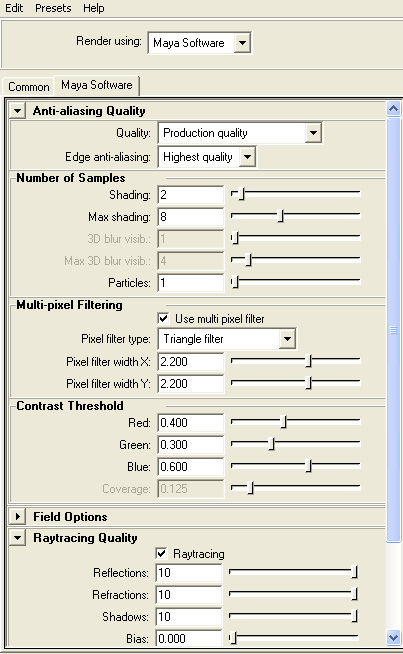
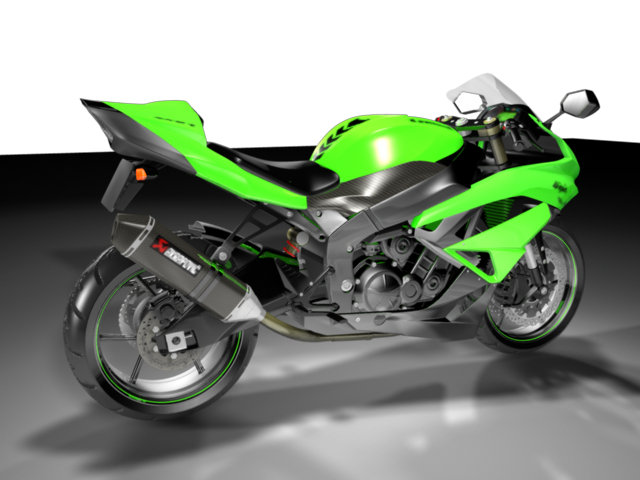
Those are my rendered image and some rendering settings. Thanks a lot!
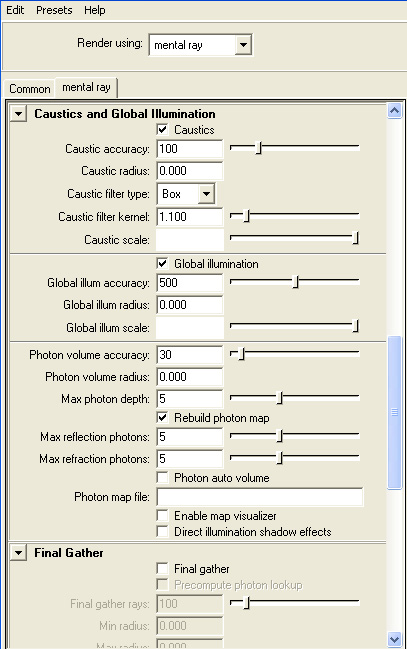
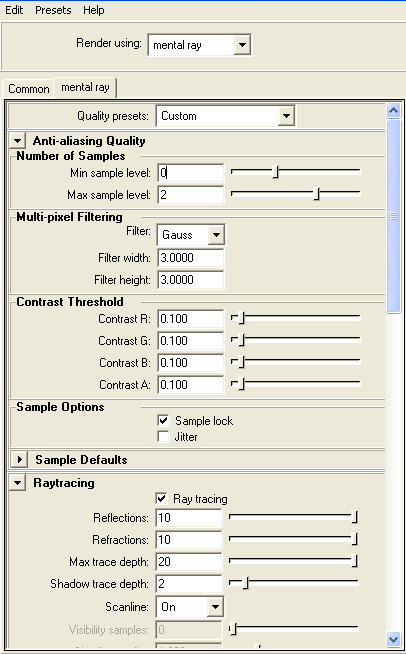
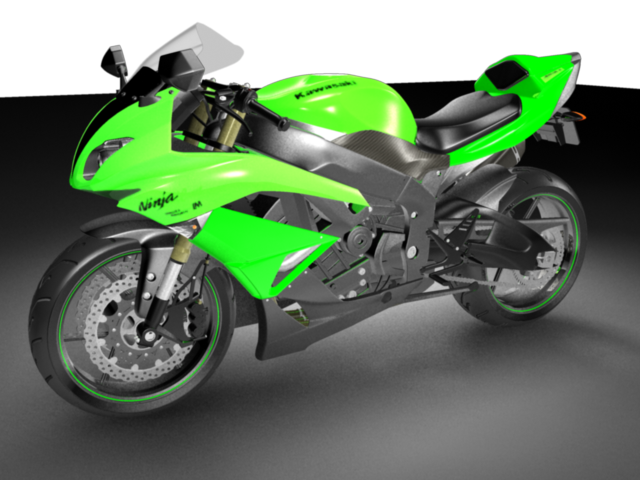
Those are my rendered image and some rendering settings. Thanks a lot!
Posted: July 17, 2009
Post subject:
Post subject:
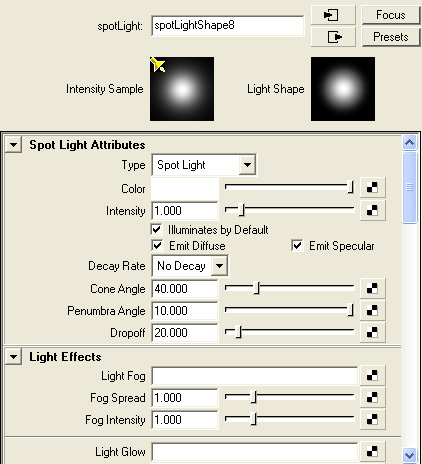
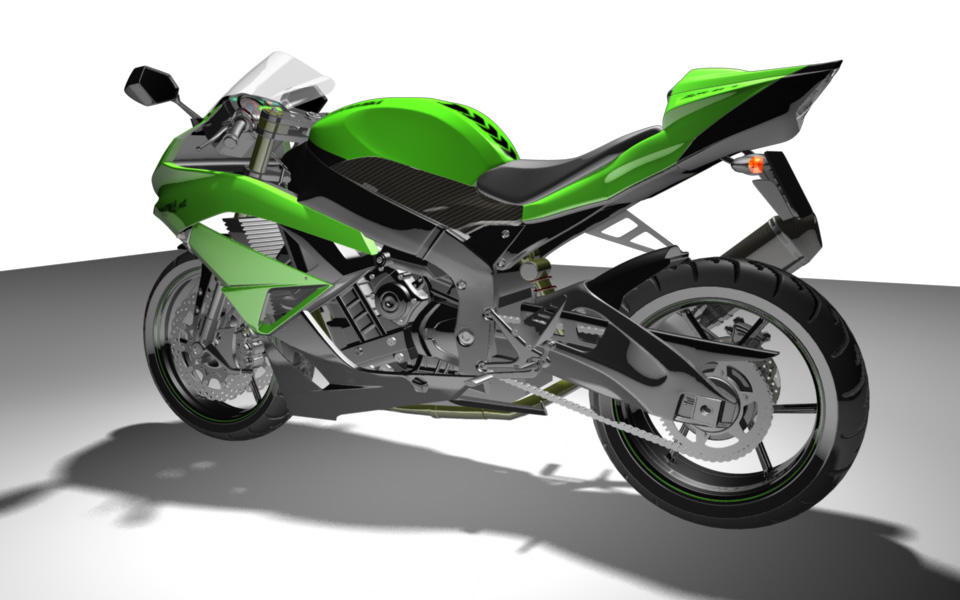
And another rendering, this scence I use 3 spot lights with the same setting. Previous scence I use 3 spot light too.
quangalpha
quangalpha
Posted: July 18, 2009
Post subject:
Post subject:
First try to remove caustics in your mental ray render setup and turn on the final gathering. Also turn off 2 of the 3 spot lights and see what you get. That's for global illumination with mental ray.
Do you know how to render with HDRI illumination?
You can try it - almost guaranteed good results.
Here is a tutorial on how to render with hdri and mental ray in MAYA.
http://en.9jcg.com/comm_pages/blog_content-art-10.htm
Now if you want to set up the lights manually using Maya Software render here is what you should do.
Choose only one light that will be main light. The other 2 lights should be 3-4 times weaker then the main light... I suggest you diminish the intensity of the other 2 spot lights in your scene instead of making the main light stronger. You can also give them a slightly different color, use either blue or red tones.
To set up the lights properly first hide or disable the help or environment lights and render the scene only with the main light on. Adjust it until you get a good contrasting image with the shadow and illumination the way you want. Work on the shaders so that they look the way you want, adjust highlights and reflectivity. Set up the shadows so that they don't miss the small objects like in your render it is better to use an area shadow for more realistic results. In the reference pic the main lights is almost above the bike. You can also create a white rectangle in the place where you main light is and add to it a self illuminated shader - this way it will reflect in your bike as if a real light would reflect.
You can also use a decay rate in the spot lights so that it behaves like a real life light, but you will have to make it stronger if you use it... After you finish with the main light turn on one of the additional lights and position it so that it fills the darkest areas in your render, but those areas should remain darker than the main illuminated part. We use the additional lights only to show more details in the shadow areas... This way we simulate the secondary illumination.
Regarding the reflection in your materials/shaders. You should either use an environment map or create some modelled environment that will be visible in reflections.
You should also learn about ambient occlusion to add it to your render for even more realism.
Posted: July 18, 2009
Post subject:
Post subject:
Many thanks Andyba! I have to pay attention on this
Posted: July 29, 2009
Post subject:
Post subject:
Hi Andyba
That is my rendering results. Not good
Lighting is very difficult.
That is my rendering results. Not good
Lighting is very difficult.
Posted: July 29, 2009
Post subject:
Post subject:
Why your background is white?
Here is a good advice... take a simple sphere and experiment with rendering it until you get good results. The sphere will render much faster and you will be able to learn all the rendering options much faster. You can even open the Maya manual and start to learn step by step every rendering option - experiment to see what it means and how it influences the rendering of your sphere. Experiment with ALL lights and material settings so that you exactly understand what is what.
This way in about 3 hours you will know more about rendering in Maya than you learned till now. After you understand how everything works try applying the technique I explained in my previous post.
When you get exactly what you want with the sphere you can place your motorcycle in it's place.
Here are some great tutorials about lighting:
http://warpedspace.org/lightingT/part1.htm
http://www.itchy-animation.co.uk/light.htm
And here are the things you should try and understand how it works to enhance your render:
Area shadows and area lights - just switching your shadows to area shadows will make your bike look better.
HDRI rendering
Ambient occlusion
Posted: July 30, 2009
Post subject:
Post subject:
Hi Andyba,
See this. Could you tell me how many percent completed?
Any suggestion, please?
See this. Could you tell me how many percent completed?
Any suggestion, please?
Posted: July 30, 2009
Post subject:
Post subject:
There are no shadows and the green part of the bike is too bright looking unrealistic. Make the colors of all the materials a bit darker so that the reflections are more visible.
hay man if u want to take the result as it is new one then use final gahter with standerd value and use photons to illuminate the scene, and the tip is that also use cautics effects, it take too much time for rendering ,but the result must be cool
khuram
khuram
| quangalpha wrote: |
| My problem is using rendering in MAYA. I render a Kawasaki but the result is bad. I want the best result like the pic. Please help URGENT!!!!!!!!
Quang |
@khuram_ktls: sorry, but caustics are only for transparent/fluid objects like water or glass. I cannot see why it would make any difference using caustics it in this render, except enhancing rendertime.
@quangalpha: you should start again learning the principles of FG, GI, Area-lights, HDRI and AO. Just as Andyba said.
@quangalpha: you should start again learning the principles of FG, GI, Area-lights, HDRI and AO. Just as Andyba said.